I’ve never quite been able to get over this one academic thing that turned into a very personal thing. Thanks to the first gut-crushing crush of my life– on a junior in Modern Art class– I decided to mint myself an Art History major, right out of the gate, first semester of college.
Ohhhh the way my heart pounded out of my chest during those lectures. Abstract Expressionism… gets me every time.
I think I thought I liked the subject a lot? But what I knew for sure was that the likelihood of a crusher crossing paths more often with her crushee was much higher if they both shared the same major at a tiny college with an even tinier Art History library.
I swear this isn’t meant to be a tale about a flowering freshman lesbian coming into her own and learning how to take the road less traveled. But it’s so easy to digress when it comes to matters of one-sided and totally unreciprocated young love.
The actual crux here has nothing to do with the true story of professing one’s love to one’s crush after a rugby party, asking one’s crush if one could kiss her, and stomaching a nauseating, years-long humiliation from crushee rejection. What matters is that because of my first female infatuation and the academic choice I made at its behest, I had to fulfill a fine arts requirement to graduate.
This requisite arrived in the form of a 2D Design class that routinely steamrolled me with weekly assignments that called for soulful self-expression via black and white lines and curves. Without exception, every Tuesday demanded an all-nighter, presenting me with 10 literal and figurative dark hours to finish the week’s project before my 11 a.m. class on Wednesday.
With a regularity akin to morning light appearing all too soon after a collegiate cram session, I received grade upon grade that never began with the first letters of the words Absolute or Bullshit.
The professor was mean. Upon collecting my final grade containing the first letter of the word Crock and the symbol that is the opposite of a plus sign, I wrote her an email. My ramblings contained all the things that a legitimately hard-working student with equal tendency to self-deprecate and self-advocate would ramble on about. She called me into her office to talk.
I recall two takeaways from that convo with self-deprecating clarity: 1. the grade that remained unchanged on my transcript, and 2. the phrase she fired to my face. “Maybe you’re not an inherently good designer.” I replied, “But isn’t that subjective?” She didn’t think so.
I remember her stinging words frequently. And this week, for whatever haunting reason, they were ringing in my ears as I was doin’ my thing, making my cheese balls.
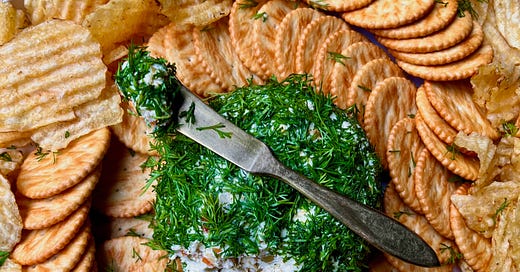
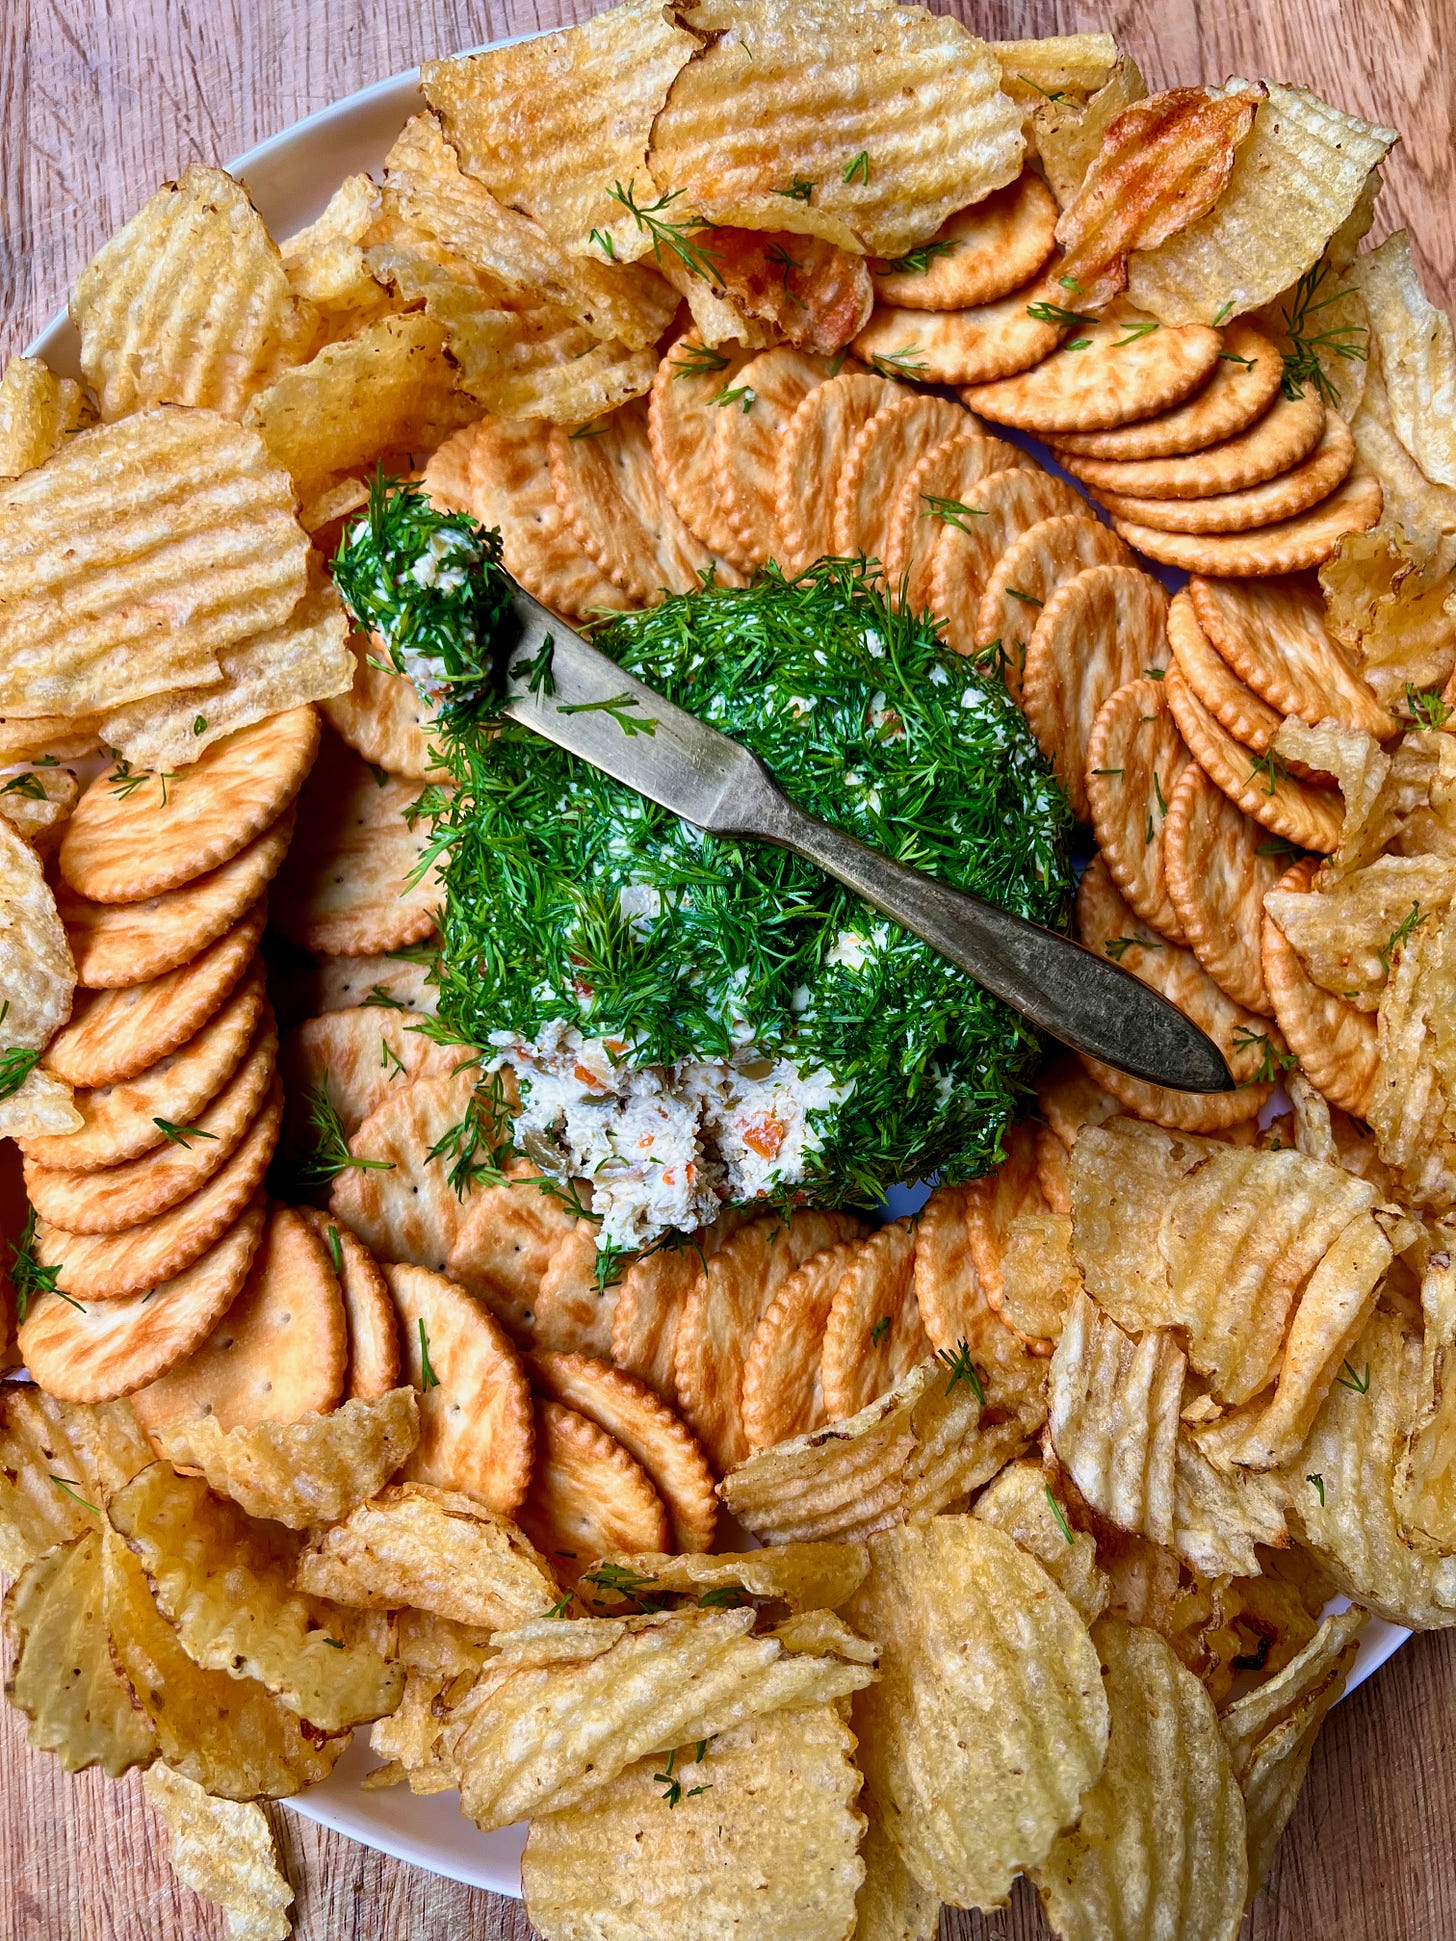
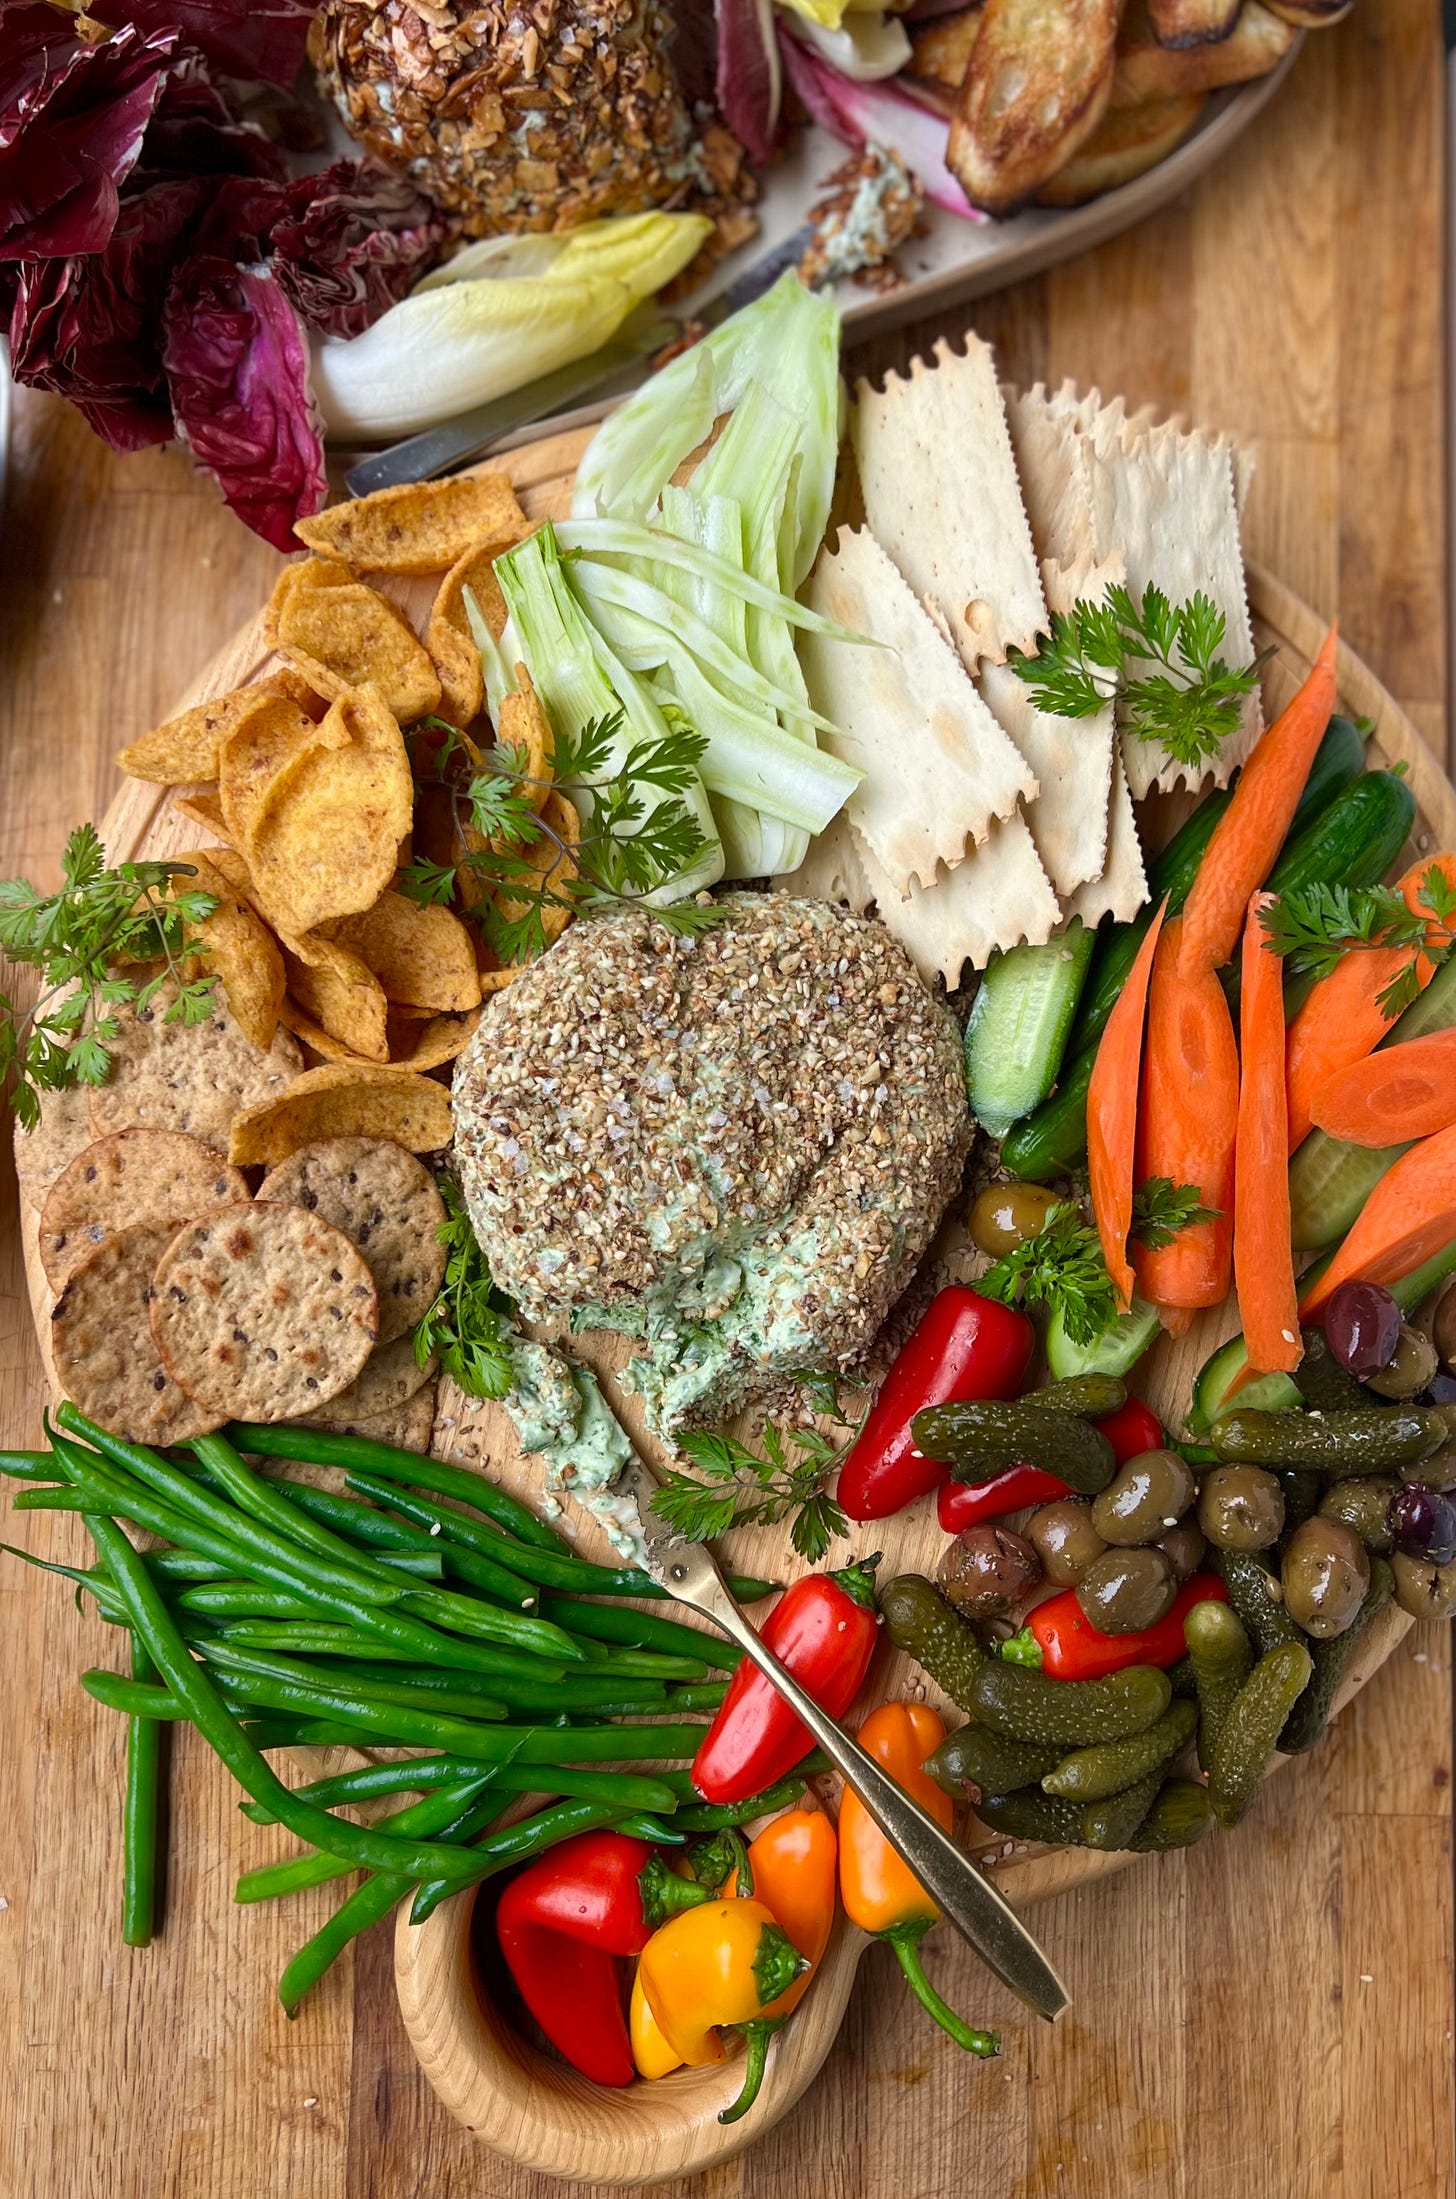
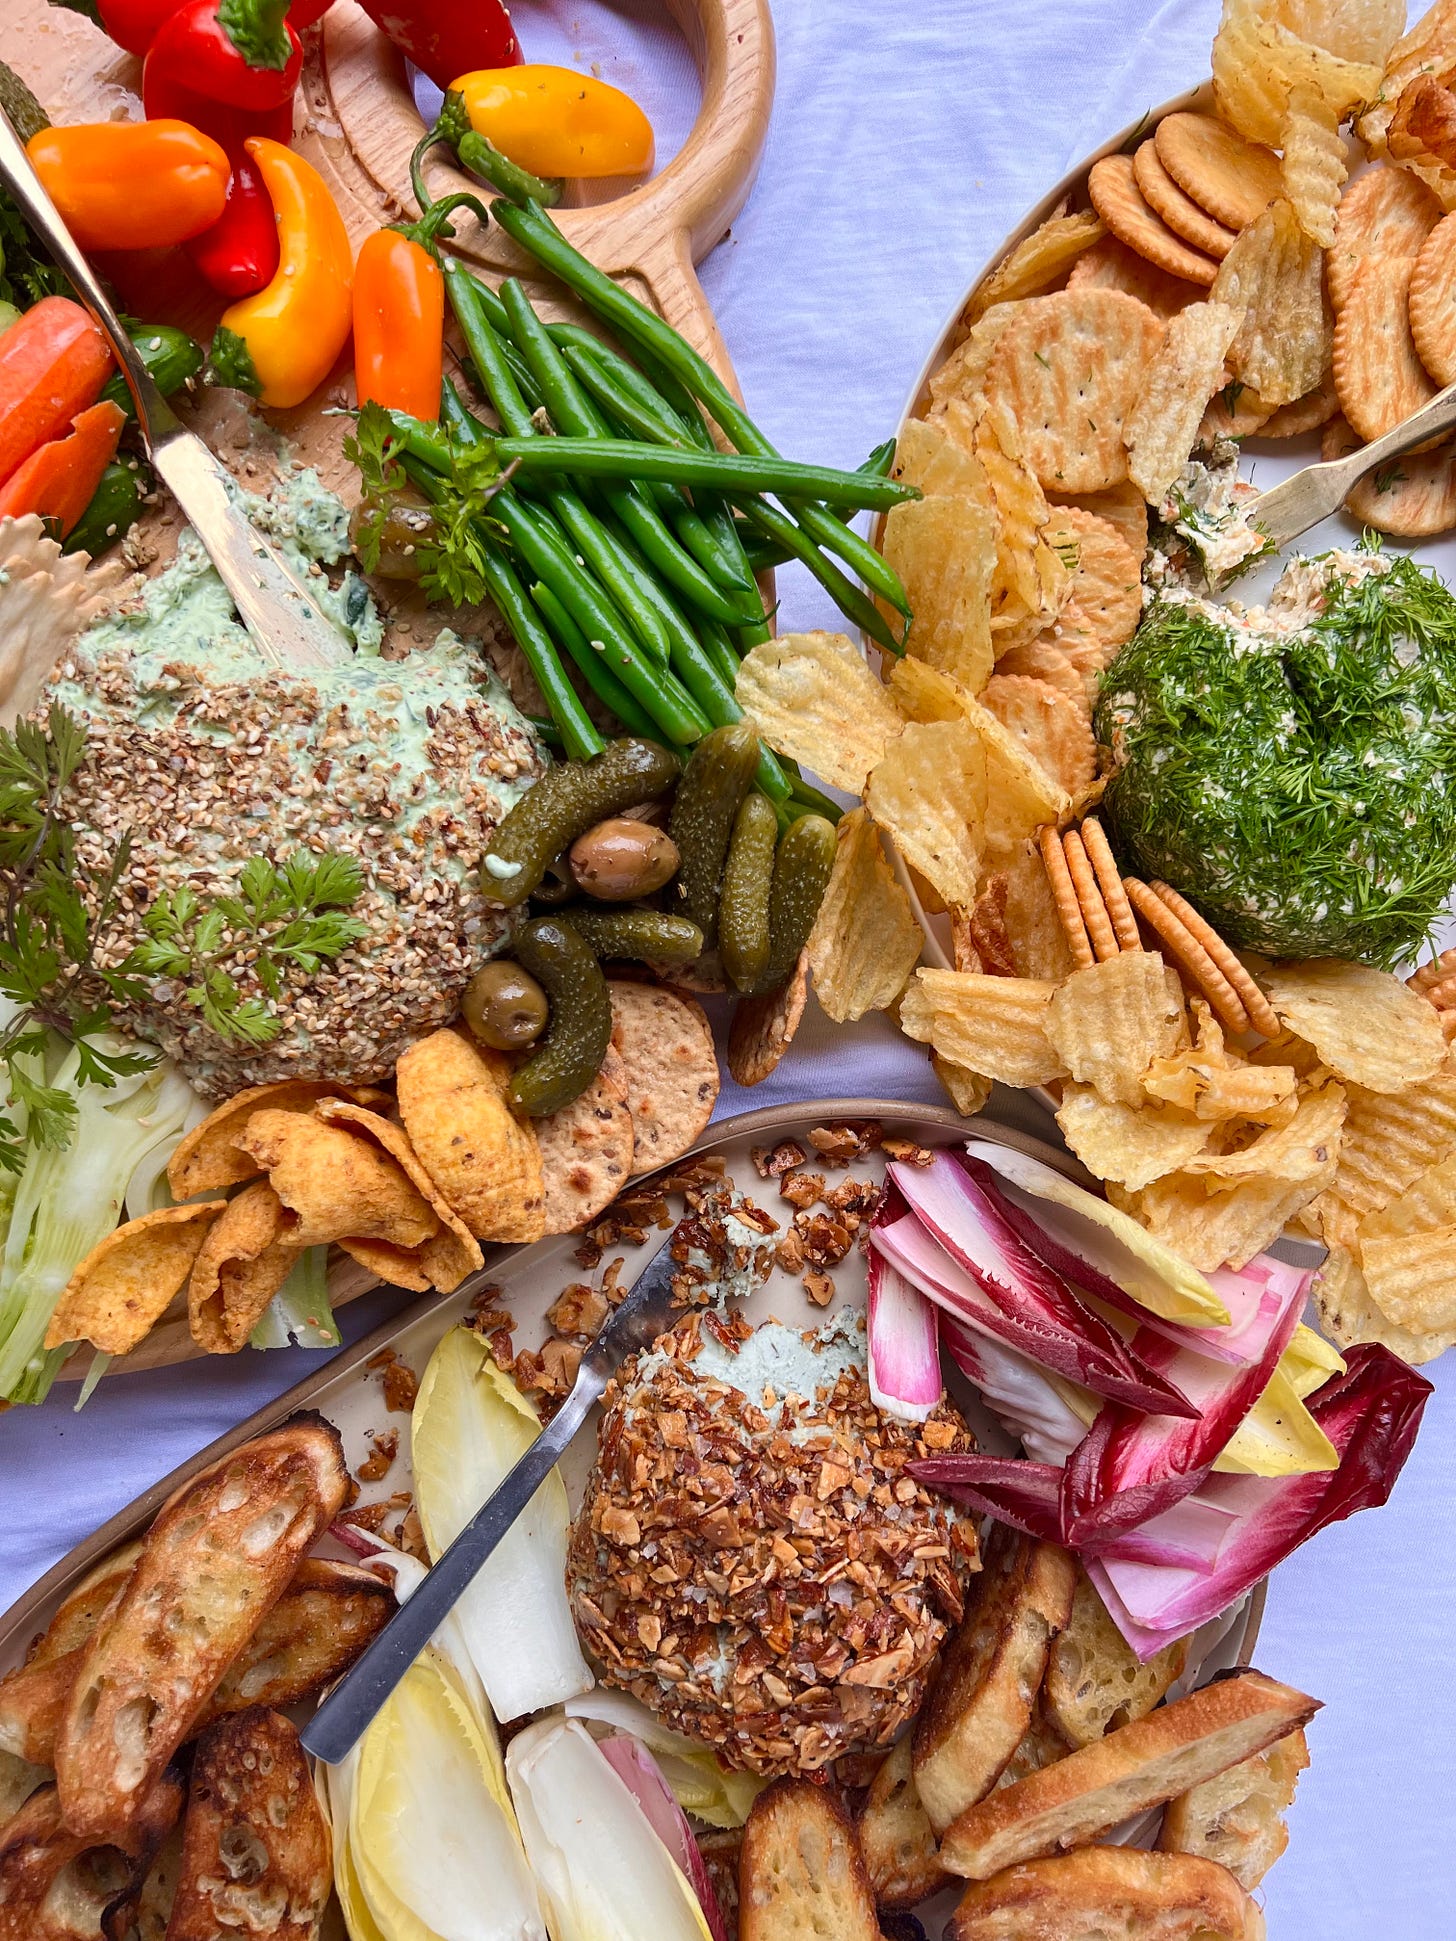
I recognize that placing a trio of cheese balls on (three teensy) pedestals and deeming them capable of dismantling years of insecurity is a bit grandiose. But the prospect that they could be all that I need to quiet that professor’s voice in my head is kind of beautiful. And that’s the thought that came over me, mix ‘n matching Ritz and Ruffles, rolling a cucumbery goat cheese ball into dukkah and Maldon, and mindlessly— no, meditatively— wielding my knife through whatever crossed its path.
In the same way that aloe soothes a scorch, a cheddar so sharply lactic– cut with olives and lemon and dill– just might mend the past. Roquefort with candied salt and pepper almonds helps, too.
In the spirit of taking the power back, I’m stepping in with a professorial demand of YOU, my A+ NOODLERS, by handing down a culinary assignment of sorts. Maybe you don’t care about the Super Bowl (props to you) or Super Bowl food (said props now retracted). But unless you’re vegan, intolerant of lactose, or are convinced that your food processor blade has one of your fingers slated as its next victim, I can’t imagine an excuse not to get seriously serious with these round mounds.
So… make them. Serve them. Have fun with them. Turn them into works of art, do your thing, and get creative. As you plate, let the lines and curves soulfully let loose with a self-expression that’s all your own. You’ve got much more color to work with than what was delegated to me in class.
Play up the opportunities to get super cheesy (figuratively) with these (literal) cheesy balls this weekend. Form them into the shape of footballs! Make them into “T’s” for both Taylor and Travis. Whittle gambling chips as homage to the city where all the yard line action will be going down on Sunday. Craft a football field with the dill-coated ball, forming players from crudités and crackers.
Or do what I’ll be doing, and um, not double down on something that’s already plenty cheesy. Make them (and the way you present them) symbolize whatever it is that you need them to. What is the stinger that you’re trying to overcome, and how can these cheesers become representative of a way to move on? The prospect may seem totally absurd, but drawing a connection may be easier than you think. Just don’t pull an all-nighter trying to figure it out.
CHECK IT!
Wanna see some vids of how to construct these boards and balls? GET SOME INSPO and take a LOOK here!
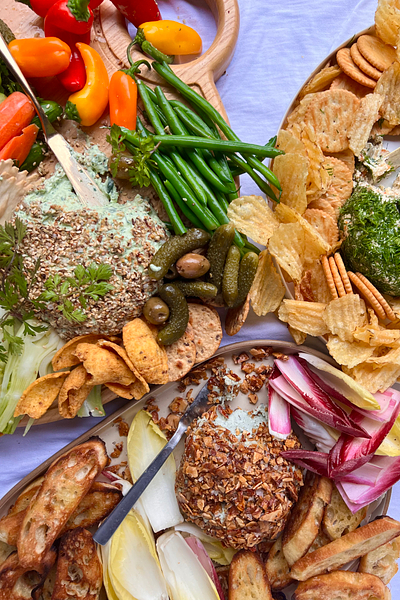
A TRIO OF CHEESE BALLS!
*Lemony Cheddar-Olive Ball with Dill and Dijon
*Herb-Packed Cucumber-Goat Cheese Ball with Seeds and Spices
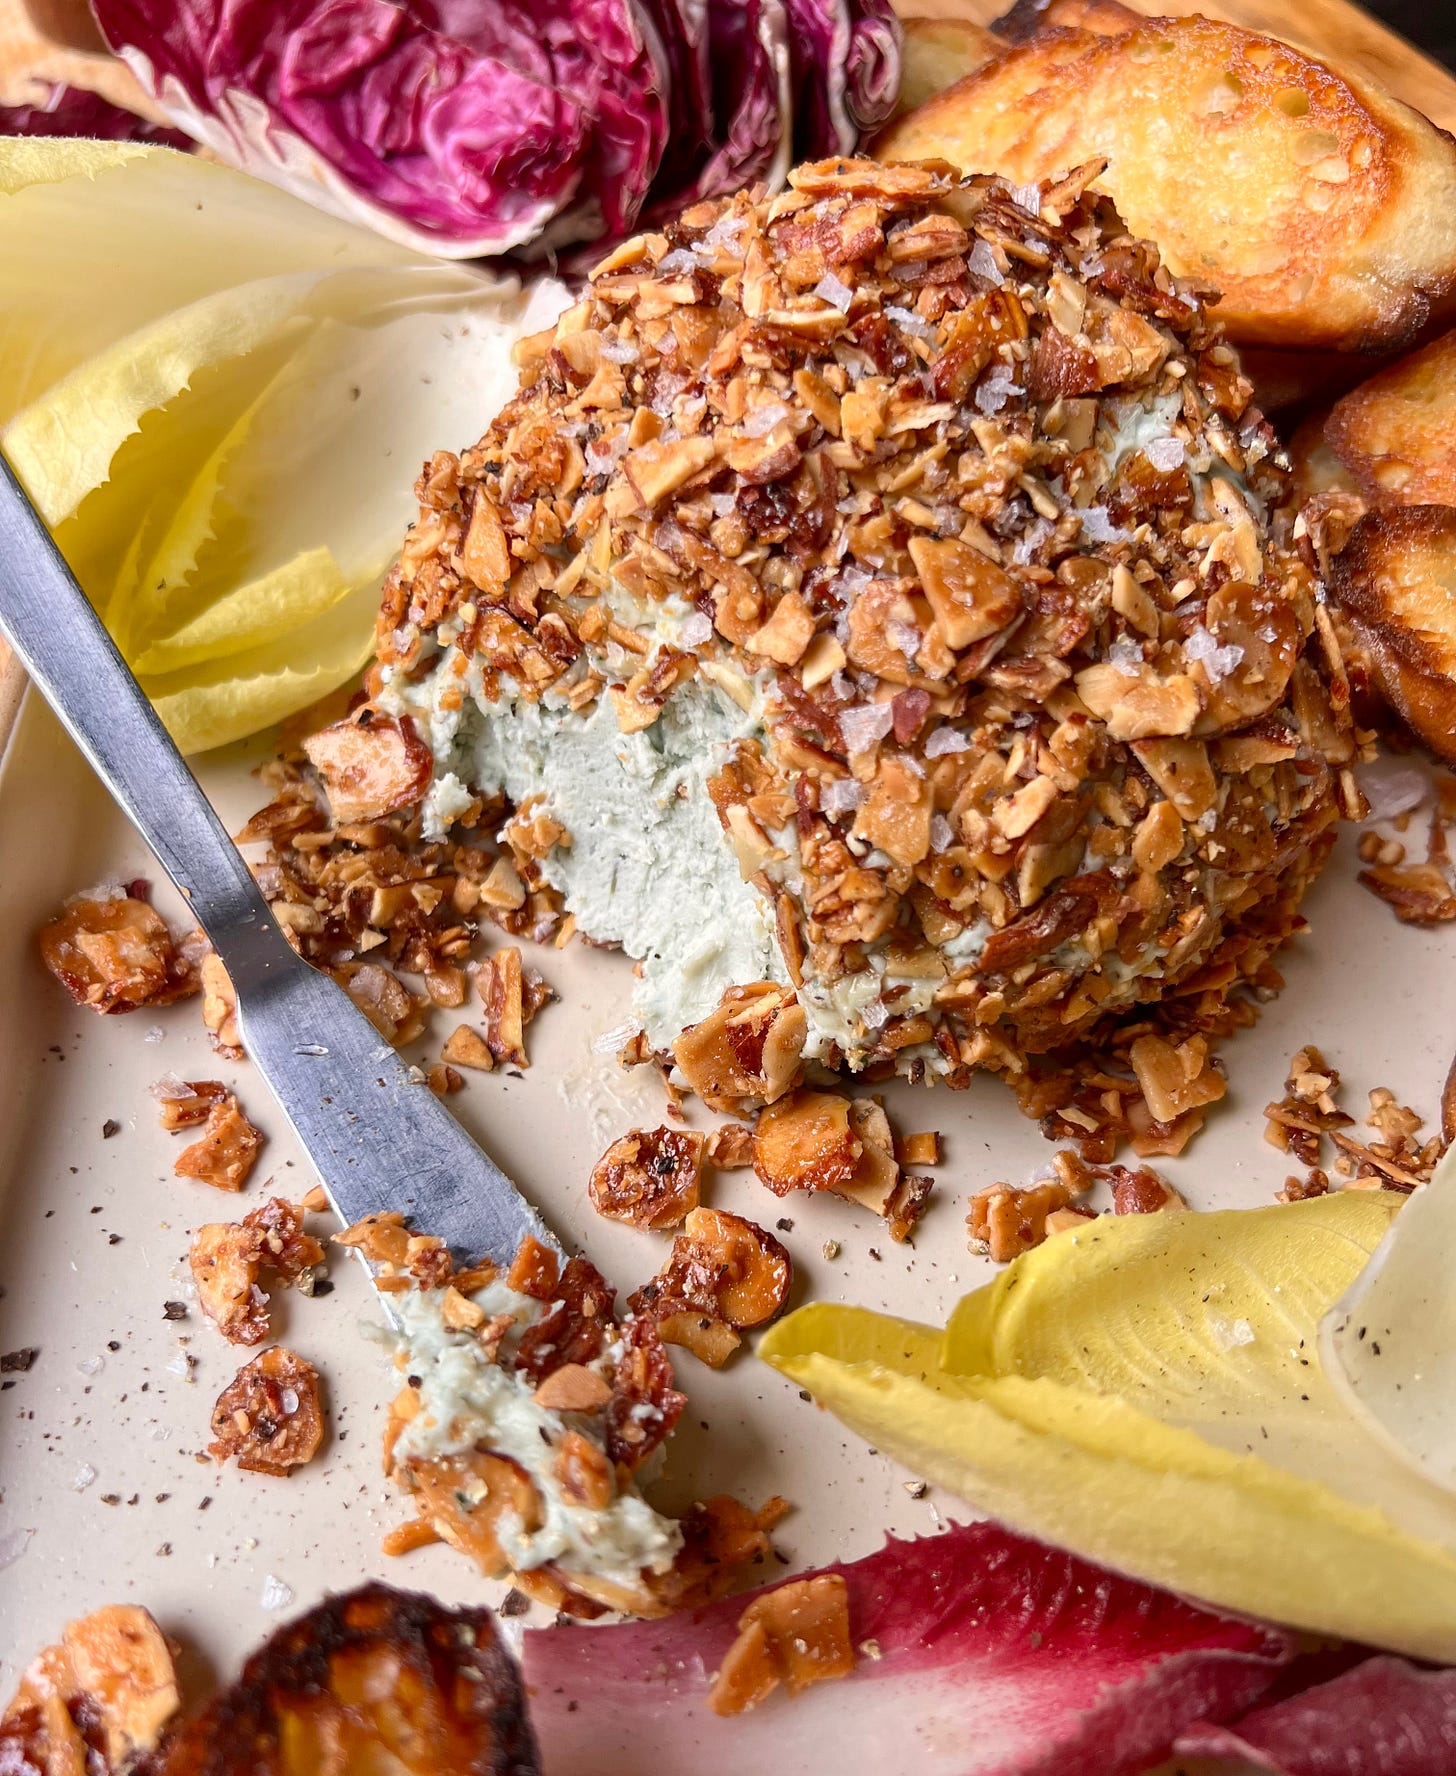
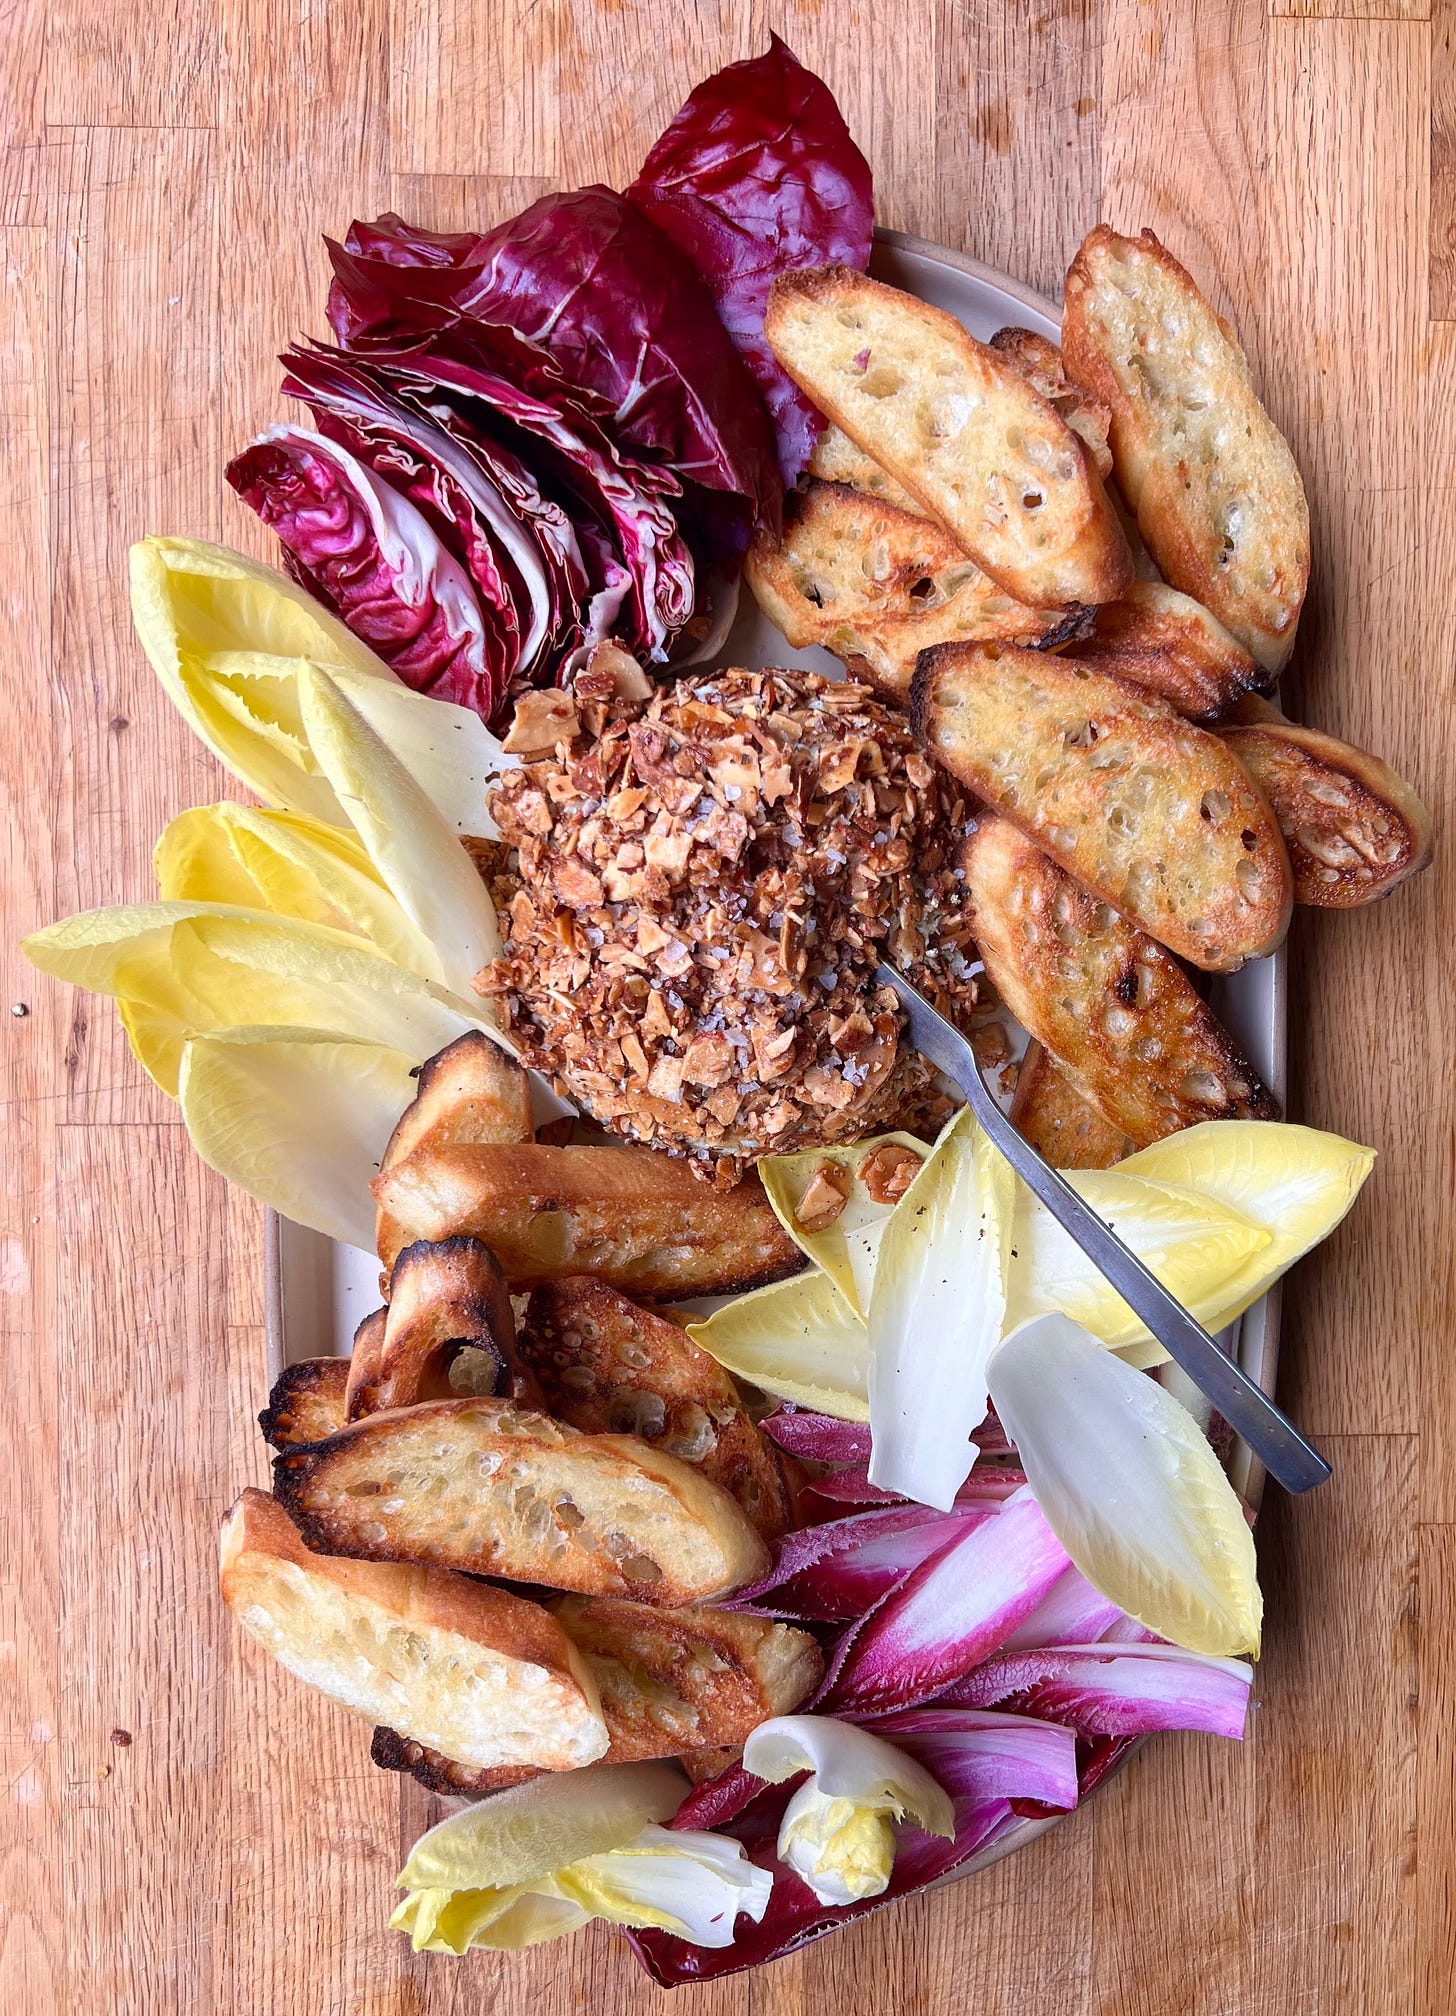
*Blue Cheese Ball with Sugared and Salted Black Pepper Almonds
REMEMBER, BEST PRACTICE: READ THE RECIPE ALL THE WAY THROUGH BEFORE YOU START COOKING!
It’s super important that your cheeses are completely at room temperature before blending, especially the cream cheese and goat cheese. A good indicator is whether or not you can poke your finger very easily into the cheese. Microwave the cream cheese or goat cheese in bursts of 5 seconds if necessary. (Don’t microwave the blue or the cheddar!)
Lemony Cheddar-Olive Ball with Dill and Dijon
4 ounces cream cheese, at room temperature
4 ounces aged and/or extra sharp white cheddar, grated on the small holes of a box grater, at room temperature (about 2 cups)
1 heaping tablespoon Dijon mustard
Zest of ½ lemon, plus 2 teaspoons lemon juice
¼ teaspoon cayenne, plus more to taste
1 small garlic clove, grated
Kosher salt and freshly ground black pepper
⅔ cup (4 ½ ounces) Spanish olives with pimentos
1 bunch dill
Crackers, chips, and mixed crudités, for serving
1. Make the cheese ball: In the bowl of a food processor, combine 4 ounces cream cheese, 4 ounces grated sharp white cheddar, 1 heaping tablespoon Dijon mustard, zest of ½ lemon plus 2 teaspoons lemon juice, ¼ teaspoon cayenne, and 1 small garlic clove, finely grated. Season with salt and pepper. Blend until very smooth, scraping down the sides of the bowl as necessary.
2. Add ⅔ cup Spanish olives with pimentos and pulse just until coarsely chopped. Do not overblend– you want to keep the texture of the olives. Taste. Season with additional salt and cayenne, if desired. If the mixture doesn’t taste punchy and full of flavor, you haven’t seasoned aggressively enough. You may even want a bit more lemon juice. Realize that the garlic and lemon zest will intensify as all of the flavors marry and chill, so don’t overdo it on those fronts.
3. Scrape the mixture onto a large piece of plastic wrap. (You can unroll two pieces slightly overlapping if you don’t have a wide roll.) Gather the edges of the plastic up into the center and twist to enclose and create a ball. Transfer to the refrigerator. Chill until very firm, at least 2 hours or up to 2 days in advance.
4. Finely chop ¾ cup dill and place on a work surface. Remove the cheese ball from the refrigerator. While still in its plastic, use your hands to shape it even more so into a ball. (Once chilled it will hold its shape even more easily than when you first formed a ball.) Unwrap and place on top of the dill. Use your hands to roll the ball in the dill to thoroughly cover, pressing and rolling as necessary to help the herbs adhere. Transfer to a serving platter and serve with desired accompaniments, with any remaining herbs from the surface sprinkled on top.
Herb-Packed Cucumber-Goat Cheese Ball with Seeds and Spices
5 ounces English cucumber (about 5-inches or ⅓ of a cucumber), unpeeled
Kosher salt and freshly ground black pepper
6 ounces cream cheese, at room temperature
6 ounces fresh goat cheese (chèvre), at room temperature
1 cup firmly packed cilantro and parsley leaves, from 1 bunch cilantro and 1 bunch parsley
1 heaping tablespoon finely chopped shallots
½ jalapeño, sliced, plus more to taste
1 ½ teaspoons onion powder
2 teaspoons coriander seeds
2 teaspoons fennel seeds
⅓ cup toasted sesame seeds or dukkah*
Maldon salt, for serving
Crackers, chips, and mixed crudités, for serving
1. Salt the cucumber: Cut a 5-ounce (about a 5-inch) piece of English cucumber in half lengthwise. Using a small spoon, scrape out a channel down the center, removing the interior seeds. Discard. Cut the two halves into lengthwise strips. Gather the strips in a bundle and cut crosswise, into a small dice. Transfer the chopped cucumber to a small bowl, sprinkle with 1 teaspoon salt, and mix to combine. Let sit, stirring from time to time, until watery and juicy, about 10-15 minutes. Transfer cucumbers to a fine-meshed sieve to drain. Press on the solids to extract as much liquid as possible. Tip! Use the remainder of the English cuke for serving.
2. Make the cheese ball: In the bowl of a food processor, combine 6 ounces cream cheese, 6 ounces fresh goat cheese, 1 cup firmly packed cilantro and parsley leaves, 1 heaping tablespoon finely chopped shallots, slices from ½ jalapeño, and 1 ½ teaspoons onion powder. Blend until very smooth, scraping down the sides of the bowl as necessary. Season generously with salt and pepper and blend again.
3. Add drained cucumbers to the food processor and pulse just once or twice to combine. Do not overprocess!! Doing so will make the mixture too loose and will be less firm once chilled. (It’ll make a great dip, though!)
4. Scrape the mixture onto a large piece of plastic wrap. (You can use two slightly overlapping pieces if you don’t have a wide roll.) Gather the edges of the plastic up into the center and twist to enclose to create a ball. Transfer to the refrigerator. If the mixture does seem a bit loose, you can place the ball into a small bowl to encourage a round shape. Chill until very firm, at least 3 hours or up to 2 days in advance.
5. While the cheese ball chills, make the coating: Toast 2 teaspoons coriander seeds and 2 teaspoons fennel seeds in a small skillet over medium heat until fragrant and lightly toasted, about 2-3 minutes. Transfer to a mortar and pestle and crush until coarsely ground. Combine with ⅓ cup toasted sesame seeds in a small bowl and season generously with salt and pepper. (Alternatively, use dukkah*, or follow the instructions in the asterisk to make your own.)
6. Place half of the seed mixture (or dukkah, if using) on a work surface. Remove the cheese ball from the refrigerator. While still in its plastic, use your hands to shape it even more so into a ball. (Once chilled it will hold its shape even more easily than when you first formed a ball.) Unwrap directly onto the seeds. Sprinkle the remaining seeds on top. Use your hands to roll the ball in the seeds to thoroughly cover, pressing and rolling as necessary to help adhere. (Using a bench scraper here can be very helpful to turn the ball and get it coated.)
Transfer the ball to a serving platter, sprinkle with Maldon salt, and serve with desired accompaniments, with any remaining seeds from the surface sprinkled on top.
*Surprisingly, Trader Joe’s makes a pretty good dukkah! But you can make a quickie dukkah-adjacent mixture by combining sesame seeds, coriander seeds, cumin seeds and fennel seeds in a skillet and toasting until fragrant. (Use 4 parts sesame seeds to 1 part of the other seeds.) Transfer to a mortar and pestle, along with 2 parts toasted hazelnuts or almonds and pound until coarsely ground. Season generously with salt and pepper (and sumac, if you have it).
Blue Cheese Ball with Sugared and Salted Black Pepper Almonds
8 ounces blue cheese, such as Stilton, Roquefort, or Danish blue, at room temperature
4 ounces cream cheese, at room temperature
1 tablespoon lightly packed thyme leaves
Kosher salt and freshly ground black pepper
3 ½ ounces (1 cup) sliced almonds
Vegetable oil or cooking spray, for greasing parchment
1 tablespoon brown sugar
3 tablespoons granulated sugar
2 tablespoons water
Crackers, chips, and mixed crudités, for serving
1. Preheat the oven to 350 degrees. Line a rimmed baking sheet with parchment.
2. Make the cheese ball: In the bowl of a food processor, combine 8 ounces blue cheese, 4 ounces cream cheese, and 1 tablespoon packed thyme leaves. Blend until very smooth, scraping down the sides of the bowl as necessary. Season with salt and pepper and blend again.
3. Scrape the mixture onto a large piece of plastic wrap. (You can use two slightly overlapping pieces if you don’t have a wide roll.) Gather the edges of the plastic up into the center and twist to enclose to create a ball. Transfer to the refrigerator. If the mixture seems a bit loose, you can place the ball into a small bowl to encourage a round shape. Chill until very firm, at least 3 hours or up to 2 days in advance.
4. While the cheese ball chills, make the Sugared and Salted Black Pepper Almonds: Place 1 cup sliced almonds on prepared baking sheet. Transfer to the oven and toast until deeply golden, stirring once halfway through, about 8-12 minutes. Transfer nuts to a medium bowl and lightly grease the parchment vegetable oil or nonstick cooking spray. Add 1 tablespoon brown sugar and toss to combine.
5. In a small saucepan, combine 3 tablespoons granulated sugar and 2 tablespoons water. Bring to a boil over high heat, stirring, until sugar is dissolved. Scrape sugar syrup into the bowl with the almonds. Toss to thoroughly coat. Season generously with salt and very generously with black pepper. Transfer to the greased parchment-lined baking sheet and spread with a spatula in an even layer. Bake, stirring twice, until the nuts look nearly dry, about 10-15 minutes. Use your timer! The nuts can burn in a matter of minutes, so watch that clock!
6. While the nuts are still warm, season again with more black pepper.
7. Transfer the nuts to a work surface and chop somewhat finely, with some larger pieces still remaining. (NOTE: Remove nuts from baking sheet while still somewhat warm to prevent sticking.)
8. Remove the cheese ball from the refrigerator. While still in its plastic, use your hands to shape it even more so into a ball. (Once chilled it will hold its shape even more easily than when you first formed a ball.) Unwrap directly onto the nuts. Use your hands to roll the ball to thoroughly cover, pressing and rolling as necessary to help adhere. (Using a bench scraper here can be very helpful to turn the ball and get it coated.)
8. Transfer to a serving platter and serve with desired accompaniments, with any remaining nuts from the surface sprinkled on top.






These look amazing! Go Nora (and go Niners!)
a absolutely loved this post! onward w best foot forward despite the small unkind minds out there.
downloaded all three :)